Quickstart & Installation
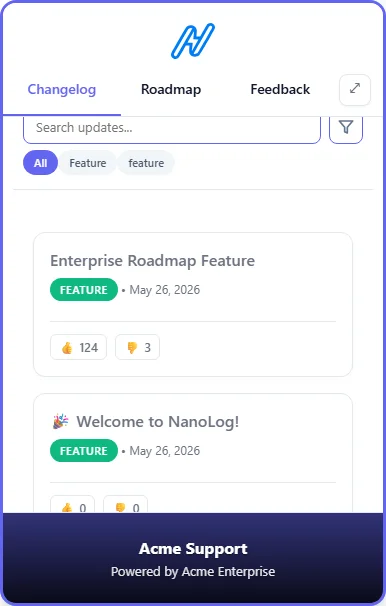
Getting NanoLog up and running on your platform takes less than two minutes. The widget is designed to be lightweight, asynchronous, and completely isolated from your existing CSS and JavaScript so it won't break your site. Once installed, it renders a gorgeous launcher FAB (Floating Action Button) that loads the unified in-app widget panel (housing updates, roadmaps, and feedback).
[!TIP] Integrating using AI Assistants? We provide a machine-readable llms.txt configuration file. Simply feed it to Cursor, GitHub Copilot, Gemini, or ChatGPT to get 100% correct, bug-free instructions for script injection, HMAC server-side signatures, custom theme bindings, and trigger hooks instantly.
Installation Steps
- Log into your NanoLog Dashboard.
- If you haven't already, create a New Project for your application.
- On the project home page, copy your project's customized HTML installation snippet.
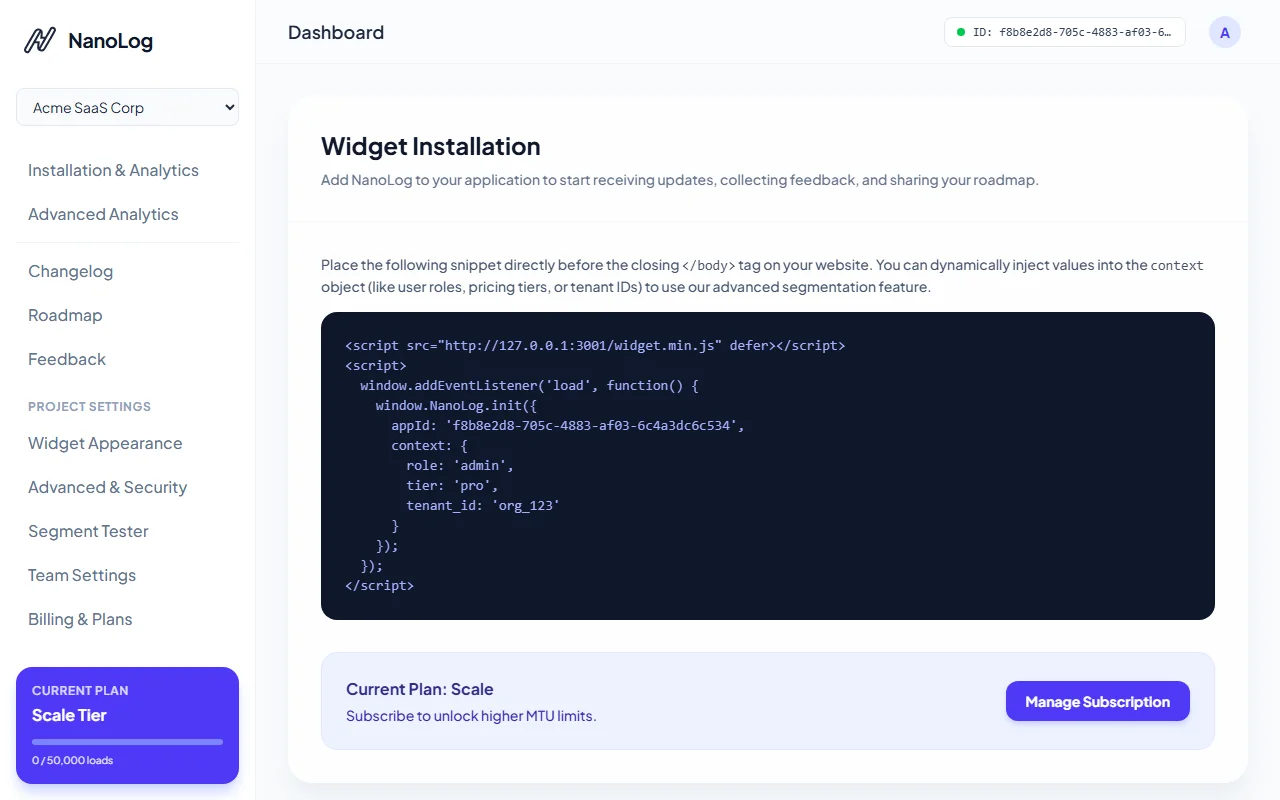
- Copy the provided HTML snippet. It will look like this:
<script src="https://nanolog.dev/widget.min.js" defer></script>
<script>
  window.addEventListener('load', function() {
    window.NanoLog.init({
      appId: 'YOUR_APP_ID',
      // Optional: Context data for segmentation
      context: {
        plan: 'pro',
        userId: '12345'
      }
    });
  });
</script>
- Paste this snippet into the
<head>or just before the closing</body>tag of your application's HTML template.
When loaded, the launcher will mount itself seamlessly on your page. When users click it, the high-fidelity in-app widget drawer will open automatically.
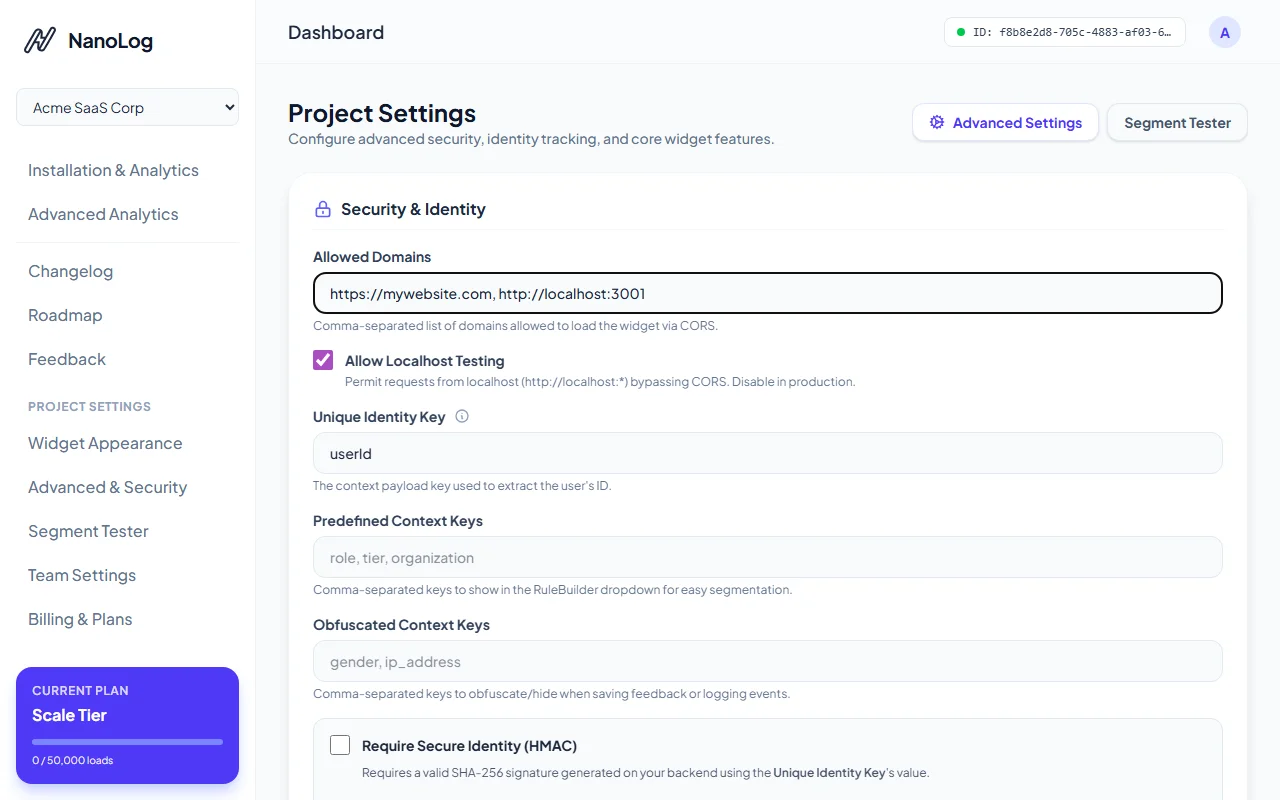
Security Configuration & Allowed Domains
To prevent unauthorized domains from embedding your widget and consuming your monthly usage quota, NanoLog strictly enforces Allowed Domains security.
- Navigate to the Advanced & Security page under Project Settings in your sidebar.
- Enter the allowed domain names (separated by commas or on new lines) where the widget is authorized to load (e.g.,
https://mywebsite.com, http://localhost:3000). - Turn on the Allow Localhost setting if you want to allow local testing and development.
- Click Save Settings. Any requests originating from unauthorized domains will be immediately blocked.
Note: If you are developing locally, make sure to enable "Allow Localhost Testing" in the Advanced Settings, otherwise the widget will refuse to load!
That's it! Your widget is now fully secure, live, and ready to engage your users!
Next Steps
Now that your widget is live, you can start publishing updates!